Do a waterfall braid: This is how you style the most beautiful braided hairstyle of the spring…
Braiding hair is not just for professionals. With these step-by-step instructions, you too can achieve a beautiful waterfall braid…
Waterfall braiding: even beginners can braid their hair this way
Braiding your hair into artistic braids is one of the hottest hair trends for spring. Haven’t really dared to try braided hairstyles yet? With these instructions, the waterfall braid is guaranteed to work! It looks more difficult and elaborate than it actually is.
WHAT DO YOU NEED FOR A WATERFALL BRAID?
For many braided hairstyles, hair needs to be at least shoulder length, but the beauty of the waterfall braid is that it also works with chin length or even relatively short hair. Even if you have curly hair, this is the perfect braid for you – most hair can be left loose and your curls still look great.
STEP-BY-STEP TUTORIAL: HOW TO DO A WATERFALL BRAID?
Braiding your hair is a breeze with these step-by-step instructions:

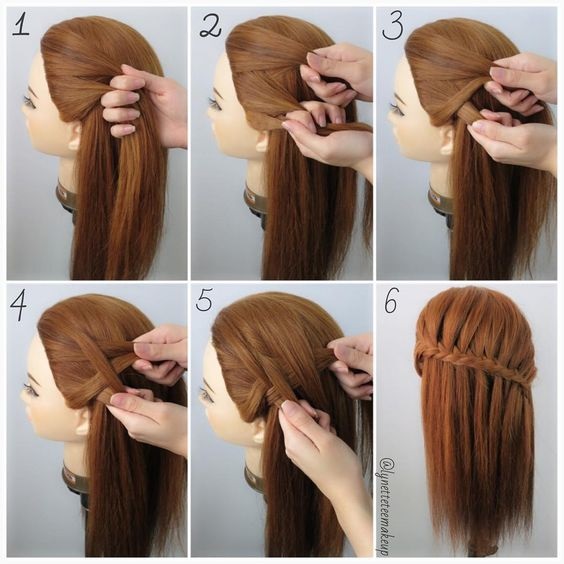
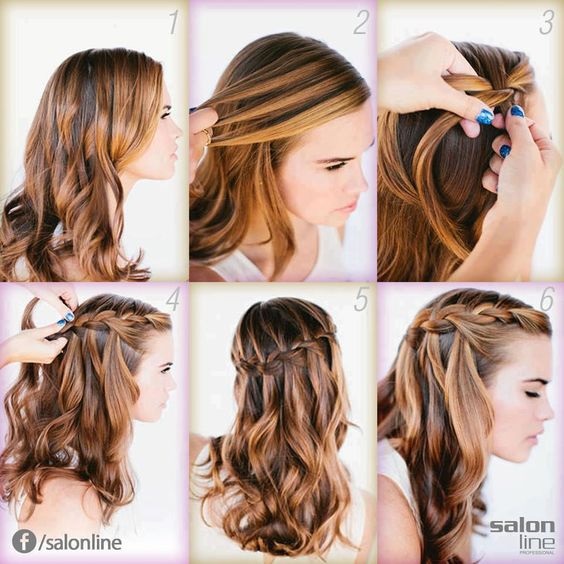
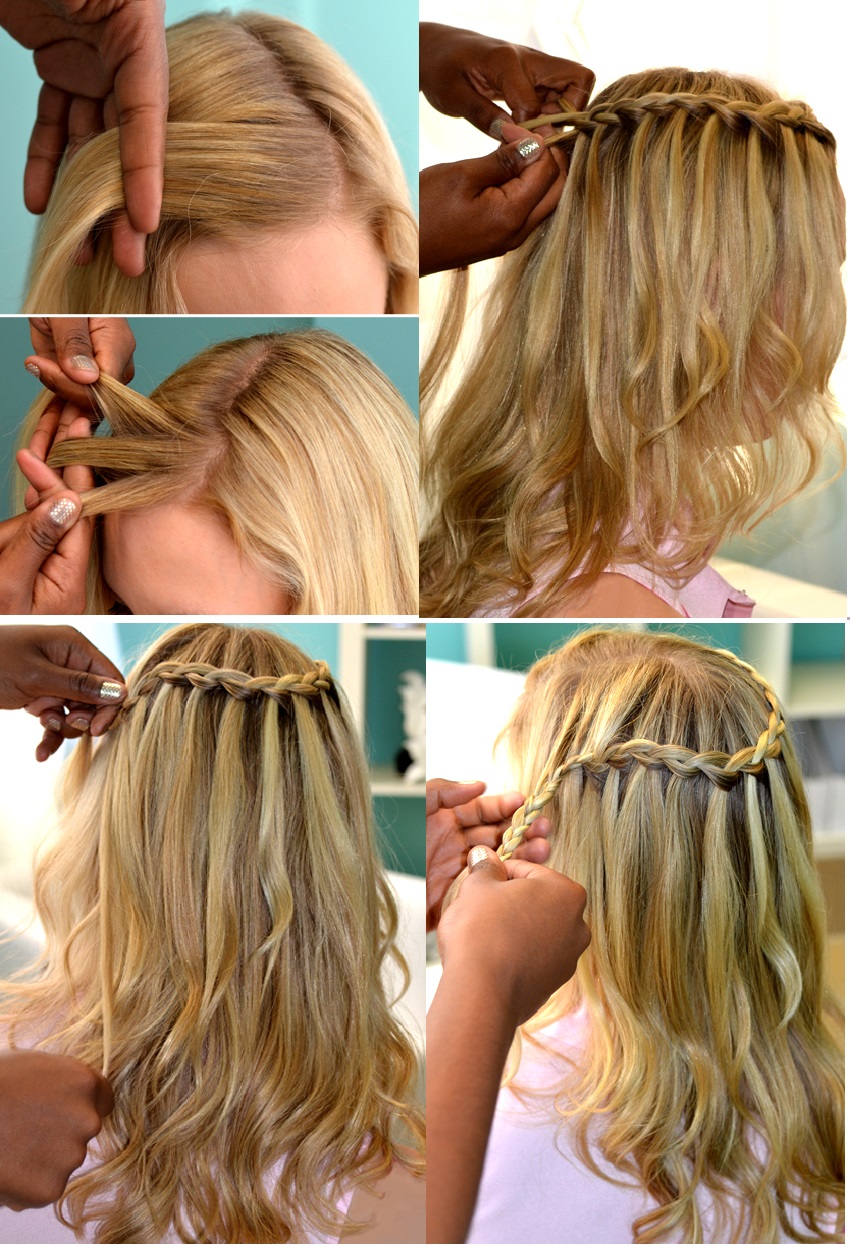
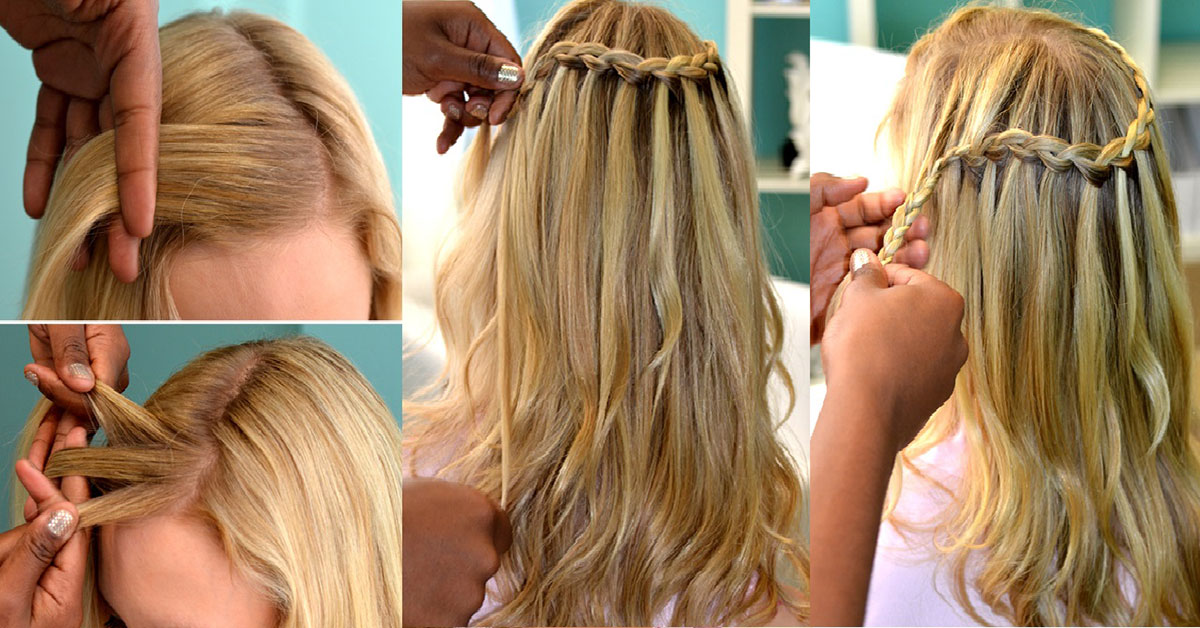
Step 1
Comb your hair well, pull your usual parting and separate two strands of hair at the front of your head on a side of your choice.
Step 2
Cross the front hair strand over the other along the hairline so that it moves away from your face.
Step 3
Add a new strand of hair from the top of your head and let it fall on top of the strand you just removed from your face.
Step 4
The third section of hair is placed on top of this “dangling” strand to create the optical waterfall effect.
Step 5
Take the bottom section of hair and pull it over the cascading section. Next, you separate another strand at the top of your head so you can make another cascading section.
Step 6
Let it fall through the other sections of hair.
Step 7
Repeat the process until your cascading braid is the length you want – the effect is best when it goes to the back of your head.
Step 8
When you’ve reached your desired end, extend the braided hair strand into a regular three-strand braid and secure it with a clear elastic.
Step 9
To hide the braided end, place it under the loose hair at the back of your head. You can easily fix it by crossing two bobby pins in an X shape.
Step 10
Loosely style the remaining hair over the pinned braid – your waterfall braid is done on one side of your head! If you wish, you can now do the exact same thing on the other side and secure both braids to the back of your head.